Multiple User Add Script:
The script reads from file containing first field as "User ID", second field as "First Name" and third field as "Last Name":
#!/bin/bash
export USER=null;
export NAME=null;
/bin/cp -p /etc/passwd /etc/passwd.$(date +%d%m%Y);
/bin/cp -p /etc/sudoers /etc/sudoers.$(date +%d%m%Y);
export NUM=`cat /var/tmp/useradd.txt|wc -l`;
for ((i = 1; i <= $NUM; i++));
do
export USER=`/usr/bin/head -$i /var/tmp/useradd.txt|tail -1|awk '{print $1}'`;
export NAME=`/usr/bin/head -$i /var/tmp/useradd.txt|tail -1|awk '{print $2" "$3}'`;
/usr/sbin/useradd -c "$NAME" -m -d /home/$USER -s /bin/bash $USER;
/bin/echo 'PASSWORD' |passwd --stdin $USER;
/usr/bin/chage -d 0 -M 90 $USER;
echo "$USER ALL=(ALL) ALL" >> /etc/sudoers;
done
Thursday, May 19, 2011


Script with EXPECT
Script to verify few processes on Remote Server via automated password less login without using SSH RSA/DSA Certificate. Expect is the catch:
################HOST1######################
#!/usr/bin/expect -f
#!/bin/bash
# set Variables
set host1 "HOST1"
set login "testuser"
set PASSWORD "testpass"
# now connect to remote UNIX box (ipaddr) with given script to execute
spawn ssh $login@$host1 "ps -aef|grep -i java"
# Look for passwod prompt
expect "*?assword:*"
# Send PASSWORD aka $PASSWORD
send -- "$PASSWORD\r"
# send blank line (\r) to make sure we get back to ui
send -- "\r"
expect eof
################HOST1######################
################HOST2######################
#!/usr/bin/expect -f
#!/bin/bash
# set Variables
set host1 "HOST2"
set login "testuser"
set PASSWORD "testpass"
# now connect to remote UNIX box (ipaddr) with given script to execute
spawn ssh $login@$host1 "ps -aef|grep -i java"
# Look for passwod prompt
expect "*?assword:*"
# Send PASSWORD aka $PASSWORD
send -- "$PASSWORD\r"
# send blank line (\r) to make sure we get back to gui
send -- "\r"
expect eof
################HOST2######################
################Consolidated#################
#!/bin/bash
########### Script by R A J E S H D O G R A for #########################
##### Setting variables null in case re-run of script ####################
set VAR1 = null;
set VAR2 = null;
set VAR3 = null;
set VAR4 = null;
set VAR5 = null;
############## Collect Data From Remote Servers ############################
/bin/echo "Checking HOST1 processes"
/bin/echo "*****************************************"
/home/monitor/host1 |grep -v testuser|awk '{print $1}'|uniq|sort|tee /home/monitor/temp1
/bin/echo "*****************************************"
sleep 1
/bin/echo "Now Checking CENTIME for processes"
/bin/echo "*****************************************"
/home/monitor/hl-centime |grep -v sscope|awk '{print $1}'|uniq|sort|tee /home/monitor/temp2
/bin/echo "*****************************************"
############ Process the data to find if services are OK ###################
export VAR1=`sed -n '1p' /home/monitor/temp1`;
export VAR2=`sed -n '2p' /home/monitor/temp1`;
export VAR3=`sed -n '1p' /home/monitor/temp2`;
export VAR4=`sed -n '2p' /home/monitor/temp2`;
export VAR5=`sed -n '3p' /home/monitor/temp2`;
#echo $VAR1 $VAR2 $VAR3 $VAR4 $VAR5;
if [ "$VAR1" == "proc1" -a "$VAR2" == "proc2" -a "$VAR3" == "proc3" -a "$VAR4" == "proc4" -a "$VAR5" == "proc5" ];
then
echo "Chill Buddy, its just a regular alert, no need to panic !!"
sleep 2
echo "*********************************************************************"
sleep 1
echo "*********************************************************************"
else
echo "Server is screwed up buddy, reload the processes"
fi
############### Kill the session ###########################################
/bin/rm -f /home/monitor/temp1;
/bin/rm -f /home/monitor/temp2;
/bin/echo "Thats it ! You can close the window"
sleep 2
/bin/echo "******** Auto Logout in 20 seconds********"
sleep 20
kill -HUP `pgrep -s 0 -o`
################Consolidated#################
################HOST1######################
#!/usr/bin/expect -f
#!/bin/bash
# set Variables
set host1 "HOST1"
set login "testuser"
set PASSWORD "testpass"
# now connect to remote UNIX box (ipaddr) with given script to execute
spawn ssh $login@$host1 "ps -aef|grep -i java"
# Look for passwod prompt
expect "*?assword:*"
# Send PASSWORD aka $PASSWORD
send -- "$PASSWORD\r"
# send blank line (\r) to make sure we get back to ui
send -- "\r"
expect eof
################HOST1######################
################HOST2######################
#!/usr/bin/expect -f
#!/bin/bash
# set Variables
set host1 "HOST2"
set login "testuser"
set PASSWORD "testpass"
# now connect to remote UNIX box (ipaddr) with given script to execute
spawn ssh $login@$host1 "ps -aef|grep -i java"
# Look for passwod prompt
expect "*?assword:*"
# Send PASSWORD aka $PASSWORD
send -- "$PASSWORD\r"
# send blank line (\r) to make sure we get back to gui
send -- "\r"
expect eof
################HOST2######################
################Consolidated#################
#!/bin/bash
########### Script by R A J E S H D O G R A for #########################
##### Setting variables null in case re-run of script ####################
set VAR1 = null;
set VAR2 = null;
set VAR3 = null;
set VAR4 = null;
set VAR5 = null;
############## Collect Data From Remote Servers ############################
/bin/echo "Checking HOST1 processes"
/bin/echo "*****************************************"
/home/monitor/host1 |grep -v testuser|awk '{print $1}'|uniq|sort|tee /home/monitor/temp1
/bin/echo "*****************************************"
sleep 1
/bin/echo "Now Checking CENTIME for processes"
/bin/echo "*****************************************"
/home/monitor/hl-centime |grep -v sscope|awk '{print $1}'|uniq|sort|tee /home/monitor/temp2
/bin/echo "*****************************************"
############ Process the data to find if services are OK ###################
export VAR1=`sed -n '1p' /home/monitor/temp1`;
export VAR2=`sed -n '2p' /home/monitor/temp1`;
export VAR3=`sed -n '1p' /home/monitor/temp2`;
export VAR4=`sed -n '2p' /home/monitor/temp2`;
export VAR5=`sed -n '3p' /home/monitor/temp2`;
#echo $VAR1 $VAR2 $VAR3 $VAR4 $VAR5;
if [ "$VAR1" == "proc1" -a "$VAR2" == "proc2" -a "$VAR3" == "proc3" -a "$VAR4" == "proc4" -a "$VAR5" == "proc5" ];
then
echo "Chill Buddy, its just a regular alert, no need to panic !!"
sleep 2
echo "*********************************************************************"
sleep 1
echo "*********************************************************************"
else
echo "Server is screwed up buddy, reload the processes"
fi
############### Kill the session ###########################################
/bin/rm -f /home/monitor/temp1;
/bin/rm -f /home/monitor/temp2;
/bin/echo "Thats it ! You can close the window"
sleep 2
/bin/echo "******** Auto Logout in 20 seconds********"
sleep 20
kill -HUP `pgrep -s 0 -o`
################Consolidated#################
Wednesday, February 24, 2010
User Migration (Redhat, CentOS, Fedora)
Following files/dirs are required for traditional Linux user management:
* /etc/passwd - contains various pieces of information for each user account
* /etc/shadow - contains the encrypted password information for user's accounts and optional the password aging information.
* /etc/group - defines the groups to which users belong
* /etc/gshadow - group shadow file (contains the encrypted password for group)
* /var/spool/mail - Generally user emails are stored here.
* /home - All Users data is stored here.
You need to backup all of the above files and directories from old server to new Linux server.
Commands to type on old Linux system
First create a tar ball of old uses (old Linux system). Create a directory:
# mkdir /root/move/
Setup UID filter limit:
# export UGIDLIMIT=500
Now copy /etc/passwd accounts to /root/move/passwd.mig using awk to filter out system account (i.e. only copy user accounts)
# awk -v LIMIT=$UGIDLIMIT -F: '($3>=LIMIT) && ($3!=65534)' /etc/passwd > /root/move/passwd.mig
Copy /etc/group file:
# awk -v LIMIT=$UGIDLIMIT -F: '($3>=LIMIT) && ($3!=65534)' /etc/group > /root/move/group.mig
Copy /etc/shadow file:
# awk -v LIMIT=$UGIDLIMIT -F: '($3>=LIMIT) && ($3!=65534) {print $1}' /etc/passwd | tee - |egrep -f - /etc/shadow > /root/move/shadow.mig
Copy /etc/gshadow (rarely used):
# cp /etc/gshadow /root/move/gshadow.mig
Make a backup of /home and /var/spool/mail dirs:
# tar -zcvpf /root/move/home.tar.gz /home
# tar -zcvpf /root/move/mail.tar.gz /var/spool/mail
Where,
* Users that are added to the Linux system always start with UID and GID values of as specified by Linux distribution or set by admin. Limits according to different Linux distro:
o RHEL/CentOS/Fedora Core : Default is 500 and upper limit is 65534 (/etc/libuser.conf).
o Debian and Ubuntu Linux : Default is 1000 and upper limit is 29999 (/etc/adduser.conf).
* You should never ever create any new system user accounts on the newly installed Cent OS Linux. So above awk command filter out UID according to Linux distro.
* export UGIDLIMIT=500 - setup UID start limit for normal user account. Set this value as per your Linux distro.
* awk -v LIMIT=$UGIDLIMIT -F: '($3>=LIMIT) && ($3!=65534)' /etc/passwd > /root/move/passwd.mig - You need to pass UGIDLIMIT variable to awk using -v option (it assigns value of shell variable UGIDLIMIT to awk program variable LIMIT). Option -F: sets the field separator to : . Finally awk read each line from /etc/passwd, filter out system accounts and generates new file /root/move/passwd.mig. Same logic is applies to rest of awk command.
* tar -zcvpf /root/move/home.tar.gz /home - Make a backup of users /home dir
* tar -zcvpf /root/move/mail.tar.gz /var/spool/mail - Make a backup of users mail dir
Use scp or usb pen or tape to copy /root/move to a new Linux system.
# scp -r /root/move/* user@new.linuxserver.com:/path/to/location
Commands to type on new Linux system
First, make a backup of current users and passwords:
# mkdir /root/newsusers.bak
# cp /etc/passwd /etc/shadow /etc/group /etc/gshadow /root/newsusers.bak
Now restore passwd and other files in /etc/
# cd /path/to/location
# cat passwd.mig >> /etc/passwd
# cat group.mig >> /etc/group
# cat shadow.mig >> /etc/shadow
# /bin/cp gshadow.mig /etc/gshadow
Please note that you must use >> (append) and not > (create) shell redirection.
Now copy and extract home.tar.gz to new server /home
# cd /
# tar -zxvf /path/to/location/home.tar.gz
Now copy and extract mail.tar.gz (Mails) to new server /var/spool/mail
# cd /
# tar -zxvf /path/to/location/mail.tar.gz
Now reboot system; when the Linux comes back, your user accounts will work as they did before on old system:
# reboot
Please note that if you are new to Linux perform above commands in a sandbox environment. Above technique can be used to UNIX to UNIX OR UNIX to Linux account migration. You need to make couple of changes but overall the concept remains the same.
* /etc/passwd - contains various pieces of information for each user account
* /etc/shadow - contains the encrypted password information for user's accounts and optional the password aging information.
* /etc/group - defines the groups to which users belong
* /etc/gshadow - group shadow file (contains the encrypted password for group)
* /var/spool/mail - Generally user emails are stored here.
* /home - All Users data is stored here.
You need to backup all of the above files and directories from old server to new Linux server.
Commands to type on old Linux system
First create a tar ball of old uses (old Linux system). Create a directory:
# mkdir /root/move/
Setup UID filter limit:
# export UGIDLIMIT=500
Now copy /etc/passwd accounts to /root/move/passwd.mig using awk to filter out system account (i.e. only copy user accounts)
# awk -v LIMIT=$UGIDLIMIT -F: '($3>=LIMIT) && ($3!=65534)' /etc/passwd > /root/move/passwd.mig
Copy /etc/group file:
# awk -v LIMIT=$UGIDLIMIT -F: '($3>=LIMIT) && ($3!=65534)' /etc/group > /root/move/group.mig
Copy /etc/shadow file:
# awk -v LIMIT=$UGIDLIMIT -F: '($3>=LIMIT) && ($3!=65534) {print $1}' /etc/passwd | tee - |egrep -f - /etc/shadow > /root/move/shadow.mig
Copy /etc/gshadow (rarely used):
# cp /etc/gshadow /root/move/gshadow.mig
Make a backup of /home and /var/spool/mail dirs:
# tar -zcvpf /root/move/home.tar.gz /home
# tar -zcvpf /root/move/mail.tar.gz /var/spool/mail
Where,
* Users that are added to the Linux system always start with UID and GID values of as specified by Linux distribution or set by admin. Limits according to different Linux distro:
o RHEL/CentOS/Fedora Core : Default is 500 and upper limit is 65534 (/etc/libuser.conf).
o Debian and Ubuntu Linux : Default is 1000 and upper limit is 29999 (/etc/adduser.conf).
* You should never ever create any new system user accounts on the newly installed Cent OS Linux. So above awk command filter out UID according to Linux distro.
* export UGIDLIMIT=500 - setup UID start limit for normal user account. Set this value as per your Linux distro.
* awk -v LIMIT=$UGIDLIMIT -F: '($3>=LIMIT) && ($3!=65534)' /etc/passwd > /root/move/passwd.mig - You need to pass UGIDLIMIT variable to awk using -v option (it assigns value of shell variable UGIDLIMIT to awk program variable LIMIT). Option -F: sets the field separator to : . Finally awk read each line from /etc/passwd, filter out system accounts and generates new file /root/move/passwd.mig. Same logic is applies to rest of awk command.
* tar -zcvpf /root/move/home.tar.gz /home - Make a backup of users /home dir
* tar -zcvpf /root/move/mail.tar.gz /var/spool/mail - Make a backup of users mail dir
Use scp or usb pen or tape to copy /root/move to a new Linux system.
# scp -r /root/move/* user@new.linuxserver.com:/path/to/location
Commands to type on new Linux system
First, make a backup of current users and passwords:
# mkdir /root/newsusers.bak
# cp /etc/passwd /etc/shadow /etc/group /etc/gshadow /root/newsusers.bak
Now restore passwd and other files in /etc/
# cd /path/to/location
# cat passwd.mig >> /etc/passwd
# cat group.mig >> /etc/group
# cat shadow.mig >> /etc/shadow
# /bin/cp gshadow.mig /etc/gshadow
Please note that you must use >> (append) and not > (create) shell redirection.
Now copy and extract home.tar.gz to new server /home
# cd /
# tar -zxvf /path/to/location/home.tar.gz
Now copy and extract mail.tar.gz (Mails) to new server /var/spool/mail
# cd /
# tar -zxvf /path/to/location/mail.tar.gz
Now reboot system; when the Linux comes back, your user accounts will work as they did before on old system:
# reboot
Please note that if you are new to Linux perform above commands in a sandbox environment. Above technique can be used to UNIX to UNIX OR UNIX to Linux account migration. You need to make couple of changes but overall the concept remains the same.
Friday, December 11, 2009
Creating a Swap File
To add a swap file:
-
Determine the size of the new swap file in megabytes and multiply by 1024 to determine the number of blocks. For example, the block size of a 64 MB swap file is 65536.
-
At a shell prompt as root, type the following command with
countbeing equal to the desired block size:dd if=/dev/zero of=/swapfile bs=1024 count=65536 -
Setup the swap file with the command:
mkswap /swapfile -
To enable the swap file immediately but not automatically at boot time:
swapon /swapfile -
To enable it at boot time, edit
/etc/fstabto include the following entry:/swapfile swap swap defaults 0 0
The next time the system boots, it enables the new swap file.
-
After adding the new swap file and enabling it, verify it is enabled by viewing the output of the command
cat /proc/swapsorfree.
Extending Swap on an LVM2 Logical Volume
To extend an LVM2 swap logical volume (assuming /dev/VolGroup00/LogVol01 is the volume you want to extend):
1. Disable swapping for the associated logical volume:
# swapoff -v /dev/VolGroup00/LogVol01
2. Resize the LVM2 logical volume by 256 MB:
# lvm lvresize /dev/VolGroup00/LogVol01 -L +256M
3. Format the new swap space:
# mkswap /dev/VolGroup00/LogVol01
4. Enable the extended logical volume:
# swapon -va
5. Test that the logical volume has been extended properly:
# cat /proc/swaps # free
1. Disable swapping for the associated logical volume:
# swapoff -v /dev/VolGroup00/LogVol01
2. Resize the LVM2 logical volume by 256 MB:
# lvm lvresize /dev/VolGroup00/LogVol01 -L +256M
3. Format the new swap space:
# mkswap /dev/VolGroup00/LogVol01
4. Enable the extended logical volume:
# swapon -va
5. Test that the logical volume has been extended properly:
# cat /proc/swaps # free
Thursday, June 11, 2009
Linux to help animals
Active Media Products just released the perfect gift for Linux nerds young and old.
The actual product wasn't made with Linux users in mind. Active Media teamed up with the WWF ( World Wildlife Fund) to make a bunch of USB drives themed after endangered animals. A portion of the proceeds from sales will go to the WWF to help stop cute animals such as Penguin from dying out.
There are four different versions of the Penguin USB drive available; 2GB, 4GB, 8GB, and 16GB versions. The 8GB version will retail for around $26 dollars, and all versions are available right now from Amazon.com and other retailers.

The actual product wasn't made with Linux users in mind. Active Media teamed up with the WWF ( World Wildlife Fund) to make a bunch of USB drives themed after endangered animals. A portion of the proceeds from sales will go to the WWF to help stop cute animals such as Penguin from dying out.
There are four different versions of the Penguin USB drive available; 2GB, 4GB, 8GB, and 16GB versions. The 8GB version will retail for around $26 dollars, and all versions are available right now from Amazon.com and other retailers.
Dog style shape of USB pen drive.
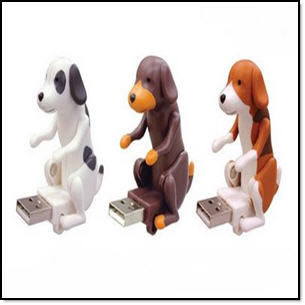
penguin shape of USB pen drive.


Multi-penguin shape of USB pen drive.
Teddy bear shape of USB pen drive.

Tuesday, May 19, 2009
How to Create a swap file in Linux partition
Linux divides its physical RAM (random access memory) into chucks of memory called pages. Swapping is the process whereby a page of memory is copied to the preconfigured space on the hard disk, called swap space, to free up that page of memory. The combined sizes of the physical memory and the swap space is the amount of virtual memory available.
Swapping is necessary for two important reasons. First, when the system requires more memory than is physically available, the kernel swaps out less used pages and gives memory to the current application (process) that needs the memory immediately. Second, a significant number of the pages used by an application during its startup phase may only be used for initialization and then never used again. The system can swap out those pages and free the memory for other applications or even for the disk cache.
Steps to create swap file
1. Use the "dd" command to create a file.
dd if=/dev/zero of=/aSwapFile bs=1024 count=65536
where dd: - is used to copy a specified number of bytes from an Input file (if) to an Output file (of).
Here the dd command copy null characters from the special file "/dev/zero" and copy it to the output file "aSwapFile" in the "/" directory. The "bs" specifies that the characters are read as BYTES. The "count" specifies the size of the bytes block that is to be created in the output file.
2. Use the "mkswap" command to set up the Linux swap area on the file created.
mkswap /aSwapFile
3. Use the "swapon" command to activate the swap file created.
swapon /aSwapFile
4. Edit the fstab "/etc/fstab" to enable the swap after a reboot.
vi /etc/fstab
(Add the following line to the fstab file.)
/aSwapFile swap swap defaults 0 0
Swapping is necessary for two important reasons. First, when the system requires more memory than is physically available, the kernel swaps out less used pages and gives memory to the current application (process) that needs the memory immediately. Second, a significant number of the pages used by an application during its startup phase may only be used for initialization and then never used again. The system can swap out those pages and free the memory for other applications or even for the disk cache.
Steps to create swap file
1. Use the "dd" command to create a file.
dd if=/dev/zero of=/aSwapFile bs=1024 count=65536
where dd: - is used to copy a specified number of bytes from an Input file (if) to an Output file (of).
Here the dd command copy null characters from the special file "/dev/zero" and copy it to the output file "aSwapFile" in the "/" directory. The "bs" specifies that the characters are read as BYTES. The "count" specifies the size of the bytes block that is to be created in the output file.
2. Use the "mkswap" command to set up the Linux swap area on the file created.
mkswap /aSwapFile
3. Use the "swapon" command to activate the swap file created.
swapon /aSwapFile
4. Edit the fstab "/etc/fstab" to enable the swap after a reboot.
vi /etc/fstab
(Add the following line to the fstab file.)
/aSwapFile swap swap defaults 0 0
Thursday, May 14, 2009
Batch file renaming
Batch file renaming can be pretty handy as it saves loads of time when you have to rename thousands of files. There are many simple ways to do it though.
If you have files with same ending pattern it can be done as:
e.g. if you want all .htm to be renamed to .html
and On other Unixes, we'd have to do something like this to batch rename files:
Though if we had bash or ksh, we could make that a little less cumbersome:
The Linux "rename" isn't going to handle to more complex cases though. For example, I had to transfer mail files from one system to another recently. On the old system, each message would be named something like "1124993500.7359464636.e-smith". On the new system, they'd be "00000001.eml", with hexadecimal numbering going on up, so you'd get "00000009.eml" and the next message would be "0000000a.eml", and so on. There's no way for "rename" to do that, but a loop can:
And if you dont want to follow any pattern and simply add new extension to all the files in a directory:
adding to it if files are placed recursively in directories:
If you have files with same ending pattern it can be done as:
e.g. if you want all .htm to be renamed to .html
rename .htm .html *.htm
and On other Unixes, we'd have to do something like this to batch rename files:
for i in *.html
do
j=`echo $i | sed 's/.htm$/.html/'`
# or, in this simple case even just: j=$"i"l
mv $i $j
done
Though if we had bash or ksh, we could make that a little less cumbersome:
for i in *.htm
do
j=${i%.htm}.html
# or: j=${i}l
mv $i $j
done
The Linux "rename" isn't going to handle to more complex cases though. For example, I had to transfer mail files from one system to another recently. On the old system, each message would be named something like "1124993500.7359464636.e-smith". On the new system, they'd be "00000001.eml", with hexadecimal numbering going on up, so you'd get "00000009.eml" and the next message would be "0000000a.eml", and so on. There's no way for "rename" to do that, but a loop can:
for i in *
do
j=`printf "%0.9x.eml\n" $x`
mv $i $j
x=$((x+1))
done
And if you dont want to follow any pattern and simply add new extension to all the files in a directory:
for i in $(ls -lArt /path/to/directory |awk '{print $9}');do mv $i $i.txt; done
adding to it if files are placed recursively in directories:
for i in $(find /path/to/root -type f -print);do mv $i $i.txt; done
Using Foremost
Foremost Syntax
foremost [-h][-V][-d][-vqwQT][-b
Available Options
-h Show a help screen and exit.
-V Show copyright information and exit.
-d Turn on indirect block detection, this works well for Unix file systems.
-T Time stamp the output directory so you don’t have to delete the output dir when running multiple times.
-v Enables verbose mode. This causes more information regarding the current state of the program to be dis-played on the screen, and is highly recommended.
-q Enables quick mode. In quick mode, only the start of each sector is searched for matching headers. That is,the header is searched only up to the length of the longest header. The rest of the sector, usually about 500 bytes, is ignored. This mode makes foremost run con- siderably faster, but it may cause you to miss files that are embedded in other files. For example, using quick mode you will not be able to find JPEG images embedded in Microsoft Word documents.
Quick mode should not be used when examining NTFS file systems. Because NTFS will store small files inside the Master File Table, these files will be missed during quick mode.
-Q Enables Quiet mode. Most error messages will be sup-pressed.
-w Enables write audit only mode. No files will be extracted.
-a Enables write all headers, perform no error detection in terms of corrupted files.
-b number Allows you to specify the block size used in foremost. This is relevant for file naming and quick searches. The default is 512. ie. foremost -b 1024 image.dd
-k number Allows you to specify the chunk size used in foremost.This can improve speed if you have enough RAM to fit the image in. It reduces the checking that occurs between chunks of the buffer. For example if you had > 500MB of RAM. ie. foremost -k 500 image.dd
-i file The file is used as the input file. If no input file is specified or the input file cannot be read then stdin is used.
-o directory Recovered files are written to the directory directory.
-c file Sets the configuration file to use. If none is speci-fied, the file “foremost.conf” from the current direc-tory is used, if that doesn’t exist then “/etc/fore-most.conf” is used. The format for the configuration file is described in the default configuration file included with this program. See the CONFIGURATION FILE section below for more information.
-s number Skips number blocks in the input file before beginning the search for headers. ie. foremost -s 512 -t jpeg -i /dev/hda1
Foremost examples
Search for jpeg format skipping the first 100 blocks
sudo foremost -s 100 -t jpg -i image.dd
Only generate an audit file, and print to the screen (verbose mode)
sudo foremost -av image.dd
Search all defined types
sudo foremost -t all -i image.dd
Search for gif and pdf
sudo foremost -t gif,pdf -i image.dd
Search for office documents and jpeg files in a Unix file sys-tem in verbose mode.
sudo foremost -v -t ole,jpeg -i image.dd
Run the default case
sudo foremost image.dd
image.dd means you need to enter your hardisk mount point i.e /dev/sda1 or /dev/sda2
Recover deleted files in Linux
Although there's no common "undelete" command for a Linux EXT3 file system, you can recover many types of accidentally erased files, including documents, graphics, and system files using the "Foremost" console application.
When you delete a file, the data is not really overwritten. The pointer in the filesystem to the file is simply removed so the disk area can be overwritten when necessary. The more the disk is written to after the file is deleted, the larger the chance it will be overwritten and become unrecoverable.
Foremost is a command line utility for finding and recovering deleted files based on their type. It was origionally developed for the US Air Force Office of Special Investigations. It can recover files from a number of filesystems, including fat, ext3 and NTFS. It can be installed and run from the live cd.
Foremost can recover files with the following extensions:
jpg, gif, png, bmp, avi ,exe, mpg, wav, riff, wmv, mov, pdf, ole, Excel, Access, doc, zip, XML, SXW, SXC, SXI, SX, rar, htm, cpp
For other file extensions we may need to edit /etc/foremost.conf which can be found in man page of Foremost (man foremost)
How to Install:
Enable the universe repository and install foremost:
sudo apt-get install foremost
Assuming the lost files are on a USB drive (sda), you need to create a writeable directory on another drive where you can put the recovered files
sudo mount /dev/sdb1 /recovery
sudo mkdir /recovery/foremost
And then run foremost:
sudo foremost -i /dev/sda -o /recovery/foremost
or for specific file format e.g. video (avi):
sudo foremost -t avi -i /dev/sda -o /recovery/foremost
The recovered files will then be owned by root. Change their ownership so that you can use them:
sudo chown -R youruser:yourgroup /recovery/foremost
Please note that there's no guarantee that foremost will succeed in recovering your files, but at least there's a chance.
When you delete a file, the data is not really overwritten. The pointer in the filesystem to the file is simply removed so the disk area can be overwritten when necessary. The more the disk is written to after the file is deleted, the larger the chance it will be overwritten and become unrecoverable.
Foremost is a command line utility for finding and recovering deleted files based on their type. It was origionally developed for the US Air Force Office of Special Investigations. It can recover files from a number of filesystems, including fat, ext3 and NTFS. It can be installed and run from the live cd.
Foremost can recover files with the following extensions:
jpg, gif, png, bmp, avi ,exe, mpg, wav, riff, wmv, mov, pdf, ole, Excel, Access, doc, zip, XML, SXW, SXC, SXI, SX, rar, htm, cpp
For other file extensions we may need to edit /etc/foremost.conf which can be found in man page of Foremost (man foremost)
How to Install:
Enable the universe repository and install foremost:
sudo apt-get install foremost
Assuming the lost files are on a USB drive (sda), you need to create a writeable directory on another drive where you can put the recovered files
sudo mount /dev/sdb1 /recovery
sudo mkdir /recovery/foremost
And then run foremost:
sudo foremost -i /dev/sda -o /recovery/foremost
or for specific file format e.g. video (avi):
sudo foremost -t avi -i /dev/sda -o /recovery/foremost
The recovered files will then be owned by root. Change their ownership so that you can use them:
sudo chown -R youruser:yourgroup /recovery/foremost
Please note that there's no guarantee that foremost will succeed in recovering your files, but at least there's a chance.
Up to 24 percent of software purchases open source
Open source has become big business, suggests an article in the Investors Business Daily, but it has done so by becoming more like the proprietary-software world it purports to leave behind.
The article cites recent research from IDC indicating that CIOs allocated up to 24 percent of their budgets to open-source software in 2008, up from 10 percent in 2007--a finding that jibes with recent data from Forrester. This open-source growth is propelling Red Hat to grow "at two to three times the rate of the broader software industry over a multiyear horizon," according to research from Piper Jaffray.
Monday, May 11, 2009
Tools to access Linux Partitions from Windows
If you dual boot with Windows and
It happens sometimes you need to access your files on Linux partitions from
- Explore2fs
Explore2fs is a GUI explorer tool for accessing ext2 and ext3 filesystems. It runs under all versions of Windows and can read almost any ext2 and ext3 filesystem.
Project Home Page :- http://www.chrysocome.net/explore2fs
Latest Version :- 1.07
Sample Screenshot

- DiskInternals Linux Reader
DiskInternals Linux Reader is a new easy way to do this. This program plays the role of a bridge between your Windows and Ext2/Ext3 Linux file systems. This easy-to-use tool runs under Windows and allows you to browse Ext2/Ext3 Linux file systems and extract files from there.
Project Home Page :- http://www.diskinternals.com/linux-reader/
Latest Version :- 1.0
Sample Screenshot

- Ext2 Installable File System for Windows
It provides Windows NT4.0/2000/XP/2003 with full access to Linux Ext2 volumes (read access and write access). This may be useful if you have installed both Windows and Linux
Project Home Page :- http://www.fs-driver.org/
Latest Version :- 1.10c
Sample Screenshot

- rfsd: ReiserDriver
ReiserDriver is an Installable File System Driver (IFSD), used to easily (and natively!) read ReiserFS disk partitions under Microsoft
Project Home Page :- http://sourceforge.net/projects/rfsd/
Wednesday, May 6, 2009
Restricting Remote Logins to listed users
To restrict remote logins to specific users, do the following:
1. Create a file called /etc/remusers with the names of the users, that are allowed to perform remote logins. It can look like:
root
nixuser
2. Modify the /etc/profile and /etc/csh.login files by adding the code listed below.
Putting the following code in /etc/profile and /etc/csh.login will keep users not listed in the file /etc/remusers from being able to login from remote location or telnet session. Be sure carriage returns are not included in the script files when you add the below code to them or the scripts will not run correctly, giving strange errors. Carriage returns are many times accidently embedded when code is copied from Windows or DOS based machines to Linux based machines.
- trap "" 2 3
- if { $LOGNAME != "root" ]
- then
- if [ $TERM != "linux" ]
- then
- if [ -z `cat /etc/remusers |grep $LOGNAME` ]
- then
- echo " *************************************************** "
- echo " * * "
- echo " * Remote logins are not allowed on this system * "
- echo " * Please use a terminal or see the administrator. * "
- echo " * Press RETURN to exit. * "
- echo " * * "
- echo " *************************************************** "
- echo
- read
- exit
- fi
- fi
- fi
- trap 2 3
Line 1 traps SIGINT and SIGQUIT, so users cannot abort the script. Line 2 is a safety, in case you change the /etc/profile before you create the /etc/remusers file. Line 4 only runs the script if the terminal is not local. The "linux" terminal type is used locally. You may need to change this to:
if [ $TERM == "vt100" ]
if you are using serial terminals also. As an alternate, add another if statement that excludes the serial terminal type inside the first if statement to exclude both serial terminals and local terminals. You can determine what terminal type is being used by looking at the value of the TERM variable with the env command after logging in from the terminal in question. Also there are various types of terminals that telnet clients may emulate, so, you will want to be sure not to allow any terminals that a telnet client can emulate.
Line 6 determines if the user who just logged in, $LOGNAME, is listed in the /etc/remusers file. Line 16 reads a line from the user, requiring them to press an end of line key such as RETURN. Line 17 causes the shell to exit.
Linux Configuration and Diagnostic Tools
|
System and Network Configuration
X Configuration
|
|
Library and kernel Dependency Management
Library management:
- ldd - Used to determine shared libraries used by binary files. Type "ldd /bin/ls" to see the shared libraries used by the "ls" command.
- ldconfig - Used to update links and cache for system use of the most recent runtime shared libraries.
Kernel Management:
- lsmod - List currently installed kernel modules.
- depmod - Creates a dependency file, "modules.dep" in the directory "/lib/modules/x.x.x", later used by modprobe to automatically load the relevant modules.
- insmod - Installs a loadable kernel module into the running kernel.
- rmmod - Unloads modules, Ex: rmmod ftape
- modprobe - Used to load a module or set of modules. Loads all modules specified in the file "modules.dep".
General Diagnostic
System resources
- free - Show system memory availability and usage
- df - Show the amount of disk free space on each mounted filesystem.
- du - Show disk usage
- lspci - List PCI devices
- pnpdump - Lists ISA PNP device resource information.
- vmstat - Reports virtual memory statistics.
Other:
- env - List the current environment variables.
- printenv - Print a copy of the environment.
- set - Shows how the environment is set up. This command can be very useful when debugging the environment.
- runlevel - List the current and previous runlevel.
- uname - Print system information. In my case, it prints "Linux".
- dmesg - Show the last kernel messages printed during the last boot.
Tools for working with processes
- accton - Turns process accounting on and off. Uses the file /var/log/pacct. To turn it on type "accton /var/log/pacct". Use the command with no arguments to turn it off.
- kill - Kill a process by number
- killall - Send a signal to a process by name
- lastcomm (1) - Display information about previous commands in reverse order. Works only if process accounting is on.
- nice - Set process priority of new processes.
- ps(1) - Used to report the status of one or more processes.
- pstree(1) - Display the tree of running processes.
- renice(8) - Can be used to change the process priority of a currently running process.
- sa(8) - Generates a summary of information about users' processes that are stored in the /var/log/pacct file.
- skill - Report process status.
- snice - Report process status.
- top - Displays the processes that are using the most CPU resources.
Unix / Linux shortcut keys
Shortcuts are designed to help shorten the time required to perform frequently used commands or actions. In the below sections I have listed keyboard shortcut keys that can be performed by pressing two or more keys at once. In addition to keyboard shortcut keys, I have also listed command line shortcut keys that can be typed in at the shell.
Please note that the below shortcut keys and command line shortcuts will not work on all variants of Unix and/or Linux.
Keyboard shortcut keys
- CTRL + B Moves the cursor backward one character.
- CTRL + C Cancels the currently running command.
- CTRL + D Logs out of the current session.
- CTRL + F Moves the cursor forward one character.
- CTRL + H Erase one character. Similar to pressing backspace.
- CTRL + P Paste previous line and/or lines.
- CTRL + S Stops all output on screen (XOFF).
- CTRL + Q Turns all output stopped on screen back on (XON).
- CTRL + U Erases the complete line.
- CTRL + W Deletes the last word typed in. For example, if you typed 'mv file1 file2' this shortcut would delete file2.
- CTRL + Z Cancels current operation, moves back a directory and/or takes the current operation and moves it to the background. See bg command for additional information about background.
Command line shortcuts
In addition to the below command line shortcuts, it is also helpful to use the alias command that allows you to specify a keyword for frequently used commands or mistakes.
- ~ Moves to the user's home directory.
- !! Repeats the line last entered at the shell. See history command for previous commands.
- !$ Repeats the last argument for the command last used. See history command for previous commands.
- reset Resets the terminal if terminal screen is not displaying correctly.
- shutdown -h now Remotely or locally shuts the system down.
Subscribe to:
Posts (Atom)


 Posts
Posts


